HTTPS 사용하기
보안을 위해 웹에서도 https를 사용하는 추세다. openssl로 사설인증서를 만들어 간단하게 적용할 수도 있지만 브라우저에의해 신뢰할 수 없는 SSL 인증서를 사용함으로써 기본적으로 차단된다. 그러므로 개발용이 아닌 서비스용으로 https를 사용하기 위해서는 공인된 인증기관에서 SSL을 구매하거나 무료 SSL 발급서비스를 사용할 수 있다.
SSL 인증서는 글로벌 인증 기관에서 도메인을 특정하여 발행하는 민간 인증 회사입니다. 여러분의 웹 사이트에 인증서를 취득하고자 할 경우, 인증 회사(Certificate Authority)는 해당 도메인 소유 확인 책임을 담당합니다. 그리고, 일정 기간 유효한 인증서를 발급하고 특정 도메인의 웹 사이트 암호화를 보장합니다. 기존 시스템에 인증서를 설치하는 경우, 유효 기간을 살펴보고 정기적으로 새 인증서를 발급 받아야 합니다. (인증서는 12개월 간 유효하므로 업데이트 필요)
http
웹의 기본 프로토콜은 http(80)로 모든 데이터는 평문(Plain Text)으로 송신된다. 패킷들은 여러 라우터를 거치게 되는데 이때 패킷 스니핑에 의해 데이터가 캡쳐될 수 있어 보안에 취약하다.
https
https(443)는 보안이 적용된 프로토콜로 모든 데이터가 암호화되어 안전한 데이터 송신이 보장된다. 내부적으로는 TLS(SSL에서 이름이 변경되었으나 SSL이라는 이름이 많이 사용되고 있음) 프로토콜을 사용하여 공개키를 이용하여 대칭키를 암호화하고, 이 대칭키를 이용하여 데이터를 암호화한다.
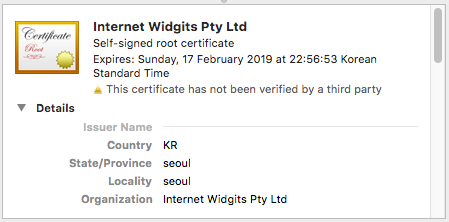
사설 SSL 인증서
사설 SSL 인증서를 사용해도 SSL 보안을 이용할 수 있다.
개인키 생성
$ openssl genrsa -des3 -out server.key 2048
Generating RSA private key, 2048 bit long modulus
...................+++
..............................................................+++
e is 65537 (0x10001)
Enter pass phrase for server.key:
Verifying - Enter pass phrase for server.key:
인증요청서 생성
$ openssl req -new -key server.key -out server.csr
Enter pass phrase for server.key:
You are about to be asked to enter information that will be incorporated
into your certificate request.
What you are about to enter is what is called a Distinguished Name or a DN.
There are quite a few fields but you can leave some blank
For some fields there will be a default value,
If you enter '.', the field will be left blank.
-----
Country Name (2 letter code) [AU]:KR
State or Province Name (full name) [Some-State]:seoul
Locality Name (eg, city) []:seoul
Organization Name (eg, company) [Internet Widgits Pty Ltd]:
Organizational Unit Name (eg, section) []:
Common Name (e.g. server FQDN or YOUR name) []:
Email Address []:

Please enter the following 'extra' attributes
to be sent with your certificate request
A challenge password []:
An optional company name []:
개인키에서 패스워드 제거
키에 패스워드가 들어있으면 서버 구동시마다 물어보게 되고 행이걸리므로 패스워드를 제거한다.
$ openssl rsa -in server.key.origin -out server.key
Enter pass phrase for server.key.origin:
writing RSA key
사설 인증서 생성
$ openssl x509 -req -days 365 -in server.csr -signkey server.key -out server.crt
Signature ok
subject=/C=KR/ST=seoul/L=seoul/O=Internet Widgits Pty Ltd
Getting Private key
웹서버셋팅(node 사용)
var http = require("http");
var https = require("https");
var fs = require("fs");

var httpsOptions = {
    key: fs.readFileSync("./server.key"),
    cert: fs.readFileSync("./server.crt")
};

function app(req, res) { res.end("Welcome"); };

http.createServer(app).listen(80);
https.createServer(httpsOptions, app).listen(443);
이렇게 해도 ssl보안을 이용할 수 있어 안전하지만 브라우저에서는 “신뢰할 수 없는 SSL 인증서를 사용중”이라고 차단시킨다. 무시하고 페이지로 이동할 수 있지만 브라우저 주소창의 붉은색 경고문이 이뻐보이지는 않는다.

References
공인 SSL 인증서
무료 SSL, Let’s Encrypt
SSL은 공인기관에서 구매해야하지만 Let’s Encrypt는 SSL 구매가 HTTPS 보급에 방해된다고 생각해 SSL을 무료로 발급해준다. 발급후 유효기간이 90일로 90일마다 갱신해줘야 하지만 갱신을 자동으로 하는 방법이 있어 개인용이나 소규모 프로젝트에서 사용하기에 무리가 없을듯 하다.
이 문서에서는 우분투(14.04.5 LTS)와 노드(v9.3.0)를 사용하였다.
Let’s Encrypt 클라이언트를 이용하여 SSL 인증서를 셋팅해보자.
$ git clone https://github.com/letsencrypt/letsencrypt
수동 셋팅
Manual로 셋팅하면 도메인 인증시 직접 서버를 구동하여 인증을 받아야 한다. 이게 어렵다면 아래 두번째 방법을 참조.
$ ./letsencrypt-auto certonly --manual
공지를 받을 수 있는 이메일을 입력한다.
Requesting to rerun ./letsencrypt-auto with root privileges...
Saving debug log to /var/log/letsencrypt/letsencrypt.log
Plugins selected: Authenticator manual, Installer None
Enter email address (used for urgent renewal and security notices) (Enter 'c' to
cancel):
약관동의
-------------------------------------------------------------------------------
Please read the Terms of Service at
https://letsencrypt.org/documents/LE-SA-v1.2-November-15-2017.pdf. You must
agree in order to register with the ACME server at
https://acme-v01.api.letsencrypt.org/directory
-------------------------------------------------------------------------------
(A)gree/(C)ancel:
EFF에 관한 이메일을 보내려고 하는데 이메일을 공유하겠느냐고 묻는다.
-------------------------------------------------------------------------------
Would you be willing to share your email address with the Electronic Frontier
Foundation, a founding partner of the Let's Encrypt project and the non-profit
organization that develops Certbot? We'd like to send you email about EFF and
our work to encrypt the web, protect its users and defend digital rights.
-------------------------------------------------------------------------------
(Y)es/(N)o:
인증서를 사용할 도메인을 입력해야 한다. 여러개를 입력하려면 콤마나 스페이스로 구분한다.
현재 서버의 IP를 공개적으로 기록해도 되겠냐고 묻는다. 동의하지 않으면 더이상 진행할 수 없다.
Please enter in your domain name(s) (comma and/or space separated)  (Enter 'c'
to cancel): kiyeon.net
Obtaining a new certificate
Performing the following challenges:
http-01 challenge for kiyeon.net

-------------------------------------------------------------------------------
NOTE: The IP of this machine will be publicly logged as having requested this
certificate. If you're running certbot in manual mode on a machine that is not
your server, please ensure you're okay with that.

Are you OK with your IP being logged?
-------------------------------------------------------------------------------
(Y)es/(N)o:
이번 단계는 도메인의 주인이 내가 맞는지 확인하는 단계다. 아래 url로 호출해서 아래의 데이터가 나오는지 확인하여 실제 주인이 내가 맞는지 검사한다.
-------------------------------------------------------------------------------
Create a file containing just this data:

hwPUzW_bSGVDDwxbBjwrdfmAonhEVazb0Pp3lgl-2oU.Yy_IksjmAfnnpQM9at54Jc-CkA7ZdkYDl3uBX02kW5Y

And make it available on your web server at this URL:

http://kiyeon.net/.well-known/acme-challenge/hwPUzW_bSGVDDwxbBjwrdfmAonhEVazb0Pp3lgl-2oU

-------------------------------------------------------------------------------
Press Enter to Continue
Enter를 하면 시작하는데 검증되지 않으면 그대로 종료된다.
Waiting for verification...
Cleaning up challenges
Failed authorization procedure. kiyeon.net (http-01): urn:acme:error:connection :: The server could not connect to the client to verify the domain :: Fetching http://kiyeon.net/.well-known/acme-challenge/hwPUzW_bSGVDDwxbBjwrdfmAonhEVazb0Pp3lgl-2oU: Connection refused

IMPORTANT NOTES:
 - The following errors were reported by the server:

   Domain: kiyeon.net
   Type:   connection
   Detail: Fetching
   http://kiyeon.net/.well-known/acme-challenge/hwPUzW_bSGVDDwxbBjwrdfmAonhEVazb0Pp3lgl-2oU:
   Connection refused

   To fix these errors, please make sure that your domain name was
   entered correctly and the DNS A/AAAA record(s) for that domain
   contain(s) the right IP address. Additionally, please check that
   your computer has a publicly routable IP address and that no
   firewalls are preventing the server from communicating with the
   client. If you're using the webroot plugin, you should also verify
   that you are serving files from the webroot path you provided.
 - Your account credentials have been saved in your Certbot
   configuration directory at /etc/letsencrypt. You should make a
   secure backup of this folder now. This configuration directory will
   also contain certificates and private keys obtained by Certbot so
   making regular backups of this folder is ideal.
간단하게 노드로 서버를 만들어 진행해보자.
// app.js
require("http").createServer(function(req, res) {
    if (req.url === "/.well-known/acme-challenge/hwPUzW_bSGVDDwxbBjwrdfmAonhEVazb0Pp3lgl-2oU") {
        res.end("hwPUzW_bSGVDDwxbBjwrdfmAonhEVazb0Pp3lgl-2oU.Yy_IksjmAfnnpQM9at54Jc-CkA7ZdkYDl3uBX02kW5Y");
    } else {
        res.end("Page Not Found.");
    }
}).listen(80);

$ sudo node app.js
다음과 같이 성공했다.
Waiting for verification...
Cleaning up challenges
IMPORTANT NOTES:
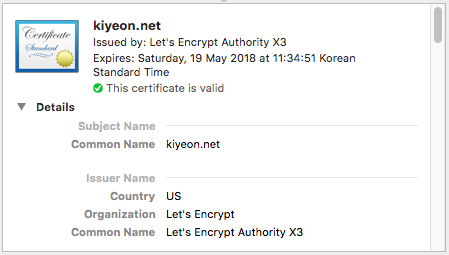
- Congratulations! Your certificate and chain have been saved at:
/etc/letsencrypt/live/kiyeon.net/fullchain.pem
Your key file has been saved at:
/etc/letsencrypt/live/kiyeon.net/privkey.pem
Your cert will expire on 2018-05-19. To obtain a new or tweaked
version of this certificate in the future, simply run
letsencrypt-auto again. To non-interactively renew *all* of your
certificates, run "letsencrypt-auto renew"
- If you like Certbot, please consider supporting our work by:
Donating to ISRG / Let's Encrypt: https://letsencrypt.org/donate
Donating to EFF: https://eff.org/donate-le
자동 셋팅
수동 셋팅이나 자동셋팅이 크게 다를건 없다. 자동셋팅은 임시서버를 만들거나 검증파일을 자동으로 만들어 인증절차를 거치므로 위와같이 검증용 서버를 따로 만들필요가 없다.
–manual 옵션을 빼면 된다.
$ ./letsencrypt-auto certonly
How would you like to authenticate with the ACME CA?
-------------------------------------------------------------------------------
1: Spin up a temporary webserver (standalone)
2: Place files in webroot directory (webroot)
-------------------------------------------------------------------------------
Select the appropriate number [1-2] then [enter] (press 'c' to cancel):
1번은 임시서버를 만들어 검증해주고 2번은 동작중인 웹루트를 지정하면 그곳에 검증파일을 자동으로 만들어주므로 수동 셋팅보다 간편하게 검증할 수 있다. 나머지는 수동 셋팅부분과 동일하다. 단 1번의 경우 임시서버를 80포트로 띄우므로 현재 서버가 실행중이라면 정지시켜야 한다.
SSL 인증서 사용
/etc/letsencrypt/live에 SSL 인증서가 발급되었음을 확인할 수 있다. 인증서를 사용할때는 인증서가 갱신되면 archive폴더에 있는 인증서들의 숫자가 업데이트 되기때문에 live폴더에 있는것을 사용한다.
$ tree /etc/letsencrypt/live
/etc/letsencrypt/live
└── kiyeon.net
    ├── cert.pem -> ../../archive/kiyeon.net/cert1.pem
    ├── chain.pem -> ../../archive/kiyeon.net/chain1.pem
    ├── fullchain.pem -> ../../archive/kiyeon.net/fullchain1.pem
    ├── privkey.pem -> ../../archive/kiyeon.net/privkey1.pem
    └── README

1 directory, 5 files

$ cat README
  This directory contains your keys and certificates.

  `privkey.pem`  : the private key for your certificate.
  `fullchain.pem`: the certificate file used in most server software.
  `chain.pem`    : used for OCSP stapling in Nginx >=1.3.7.
  `cert.pem`     : will break many server configurations, and should not be used
                   without reading further documentation (see link below).

  We recommend not moving these files. For more information, see the Certbot
  User Guide at https://certbot.eff.org/docs/using.html#where-are-my-certificates.
자, 이제 공인 SSL을 사용하여 https서비스를 사용해보자. 위에서 사용했던 코드를 그대로 이용한다.
var http = require("http");
var https = require("https");
var fs = require("fs");

var httpsOptions = {
    key: fs.readFileSync("/etc/letsencrypt/live/kiyeon.net/privkey.pem"),
    cert: fs.readFileSync("/etc/letsencrypt/live/kiyeon.net/cert.pem")
};

function app(req, res) { res.end("Welcome"); };

http.createServer(app).listen(80);
https.createServer(httpsOptions, app).listen(443);
주소창이 녹색으로 바뀌었다.
인증서 자동 갱신
Let’s Encrypt의 SSL 인증서는 90일 뒤에 만료되므로 90일마다 갱신해줘야 한다. 노드에서는 greenlock-express를 사용하여 인증서를 자동으로 갱신할 수 있으므로 만료걱정없이 https서비스를 사용할 수 있다.
renewWithin과 renewBy는 각각 인증서를 갱신할 최대기간과 최소기간을 뜻한다. 80일과 81일 사이에 자동으로 갱신하도록 한다.
var lex = require('greenlock-express').create({
    configDir: '/etc/letsencrypt',
    server: 'production',
    approveDomains: (opts, certs, cb) => {
        if (certs) {
            opts.domains = ['kiyeon.net'];
        } else {
            opts.email = 'example@mail.com';
            opts.agreeTos = true;
        }
        cb(null, { options: opts, certs });
    },
    renewWithin: 81 * 24 * 60 * 60 * 1000,
    renewBy: 80 * 24 * 60 * 60 * 1000,
});

var app = require('express')();
app.get('/', function (req, res) {
    res.end('Hello, World!');
});

// handles acme-challenge and redirects to https
require('http').createServer(lex.middleware(require('redirect-https')())).listen(80, function () {
    console.log('Listening for ACME http-01 challenges on', this.address());
});

// handles your app
require('https').createServer(lex.httpsOptions, lex.middleware(app)).listen(443, function () {
    console.log('Listening for ACME tls-sni-01 challenges and serve app on', this.address());
});
References
- Lets’ Encrypt로 무료로 HTTPS 지원하기
- LETSENCRYPT 에서 SSL 인증서를 무료로 발급 받아 웹 서버에 적용하기
- node.js에서 Let’s Encrypt (무료 SSL) 적용하기
- [Ubuntu] Let’s Encrypt 를 사용하여 무료로 SSL 사이트를 구축하는 방법
반무료, AWS ACM
AWS(Amazon Web Service)에서도 ACM(Amazon Certificate Manager)으로 무료 SSL을 지원한다. 여기서 반무료라고 한것은 SSL은 무료지만 SSL을 사용하기 위해 ELB를 사용해야 하는데 이 ELB가 유료이고 트래픽에 따라 월 최소 1,2만원이 부과되는데, 따지고 보면 유료 SSL보다 더 비쌀 수 있다.
1분 개념
ELB에서 SSL인증처리후 인스턴스로 리다이렉트 함.
준비물
- Domain
- Instance
- Route53(트래픽 양에 따라 과금)
- ELB(Elastic Load Balnce) - LB개수와 트래픽양에 따라 과금
과정
도메인의 DNS를 Amazon으로 셋팅하고(이하 Route53), ACM을 통해 SSL을 발급받은 환경처리가된 ELB를 Route53과 연결한다. 이제 https연결요청이 오면 Route53에서 ELB를 찾아가고 ELB에서는 SSL처리를 해준후 지정된 인스턴트로 연결해준다.
- 도메인 구입
- AWS ACM 신청, 승인, 처리
- LB에서 SSL및 인스턴트 포트 지정
- 도메인 DNS를 AWS Route53로 변경
- AWS Route53에서 A Zone을 LB에 연결
- AWS ACM을 통해 도메인의 SSL Sertificate를 발급
장점
- 쉽게 쓸 수 있다.
- SSL을 무료로 쓸 수 있다.
- 매번 셋팅해야하는 번거로움이 없다. (자동갱신)
단점
- Route53(한달 0.5$ 과금)과 ELB(한달 16.75$ 과금) 서비스를 사용으로 인한 과금이 발생하므로 완전무료는 아니다.
References
- 신규 AWS Certificate Manager – 무료 SSL/TLS 인증 서비스 제공
- AWS SSL 적용 방법
- AWS Certificate Manager(ACM) 서울리전 오픈 및 ELB에 적용하기
- EC2 instance 앞에 ELB를 두고 SSL(HTTPS) 적용하기
기타
http 요청을 https로 리다이렉트 하는 방법?
- 빠른 방법
- 웹 서버 설정에서 http포트로 요청이 오면 301(Moved Permanently, 영구 이동)과 함께 https 주소로 리다이렉트 시킨다.
- 장기적인 방법
- url canonical을 설정하여 검색엔진에게 http를 더이상 사용하지 않는다는걸 알린다.
- 코드내 링크의 프로토콜 부분(http://)을
//로 바꾼다. 의미는 현재 프로토콜을 상속한다는 뜻이다. 현재 프로토콜이 http면 http로 https면 https로 그대로 사용하겠다는 의미로 코드내에서 프로토콜을 강제하지 않는다. - 프론트 스크립트단에서 프로토콜이 http면 https로 리다이렉트한다.
Custom Domain을 사용하는 Github Pages Https 적용하는 방법?
기본적으로 Github Pages는 자사에서 제공하는 github.io도메인에 대해 https를 제공하지만 custom domain에 대해서는 https를 제공하지 않는다. 방법은?
- Set Up SSL on Github Pages With Custom Domains for Free - Cloudflare에서 Free Flexible SSL 서비스를 지원한다.(AWS의 ACF(Amazon Cloud Front)도 같은 서비스) 즉 정적 콘텐츠를 중개해주는 서버다. 서버의 정적데이터를 CDN에서 복사해다가 세계 각지의 엣지(?)서버에 배포하고 사용자가 접근하려고할때 가장 인접한곳의 CDN에서 데이터를 받아가게 한다. 즉 원본은 github.io에 있고 그걸 복사해다가 배포서버에 두고 배포서버에서 SSL로 서비스를 제공하는 방식이
Flexible SSL이다. 중개서버에서 SSL을 제공하는 것이다. 즉 완벽하진 않으므로 서비스업체에서도 그닥 추천하지는 않는다.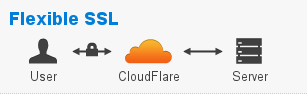
References
- HTTPS와 SSL 인증서
- [TLS] SSL에 대해 알아보아요
- HTTPS로 보안 강화하기
- What do the SSL options mean? - Flexible SSL, Full SSL, Full SSL(Strict) 등 다양한 옵션의 SSL 방식